Free No-Sew Amigurumi Bunny Crochet Pattern
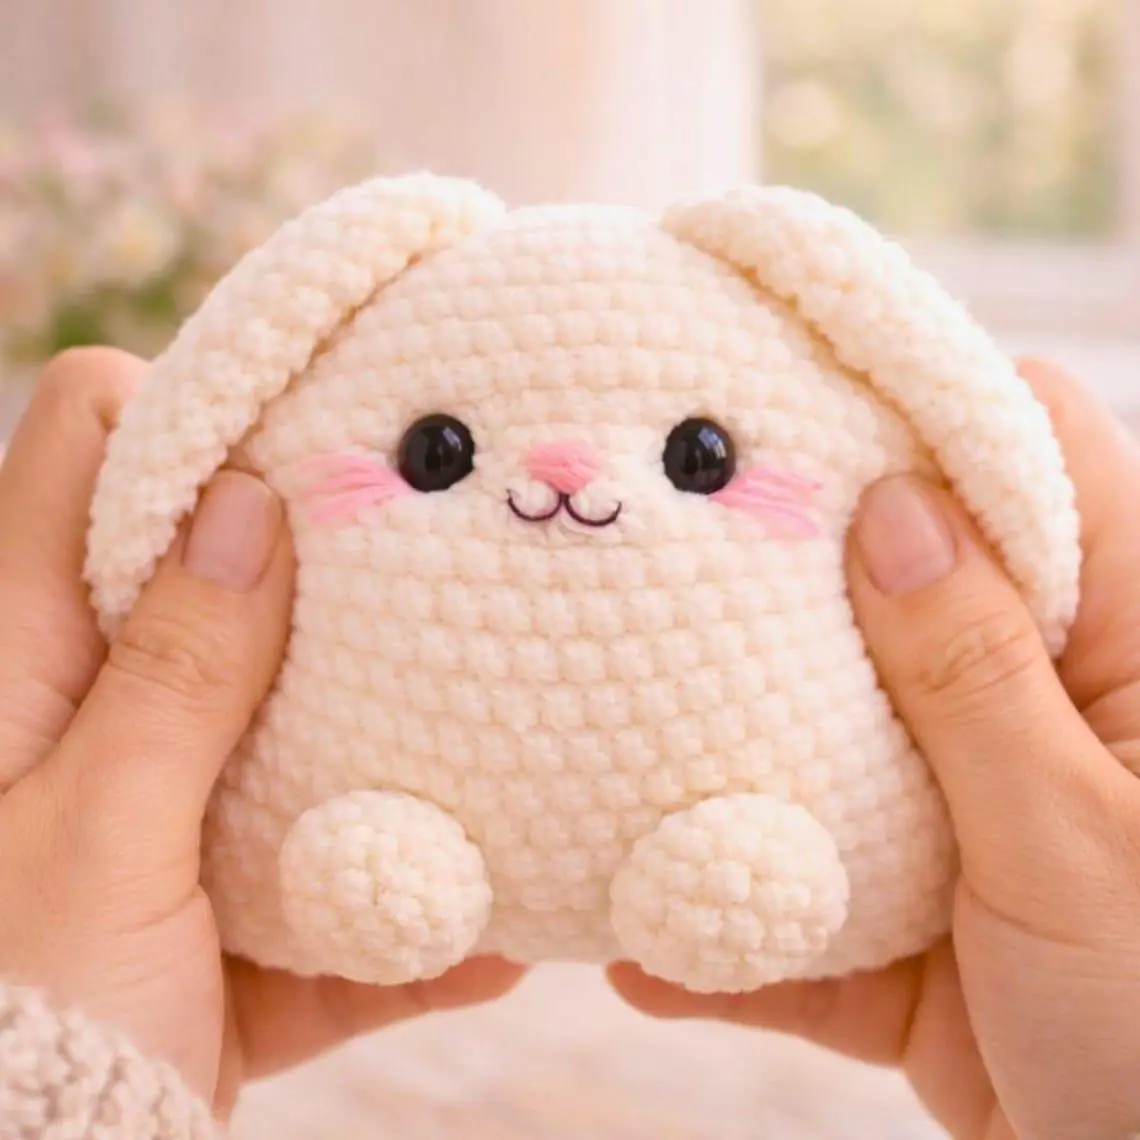
If you love fast crochet projects, squishy plushies, and patterns that don’t require sewing tiny pieces together, this Free No-Sew Amigurumi Bunny Crochet Pattern is about to become your new favorite make.
This chubby little bunny has floppy ears, a round marshmallow body, and a tiny bobble tail-and the best part is that everything is crocheted in one seamless piece. No sewing ears. No sewing tail. No attaching arms or legs.
This style of no-sew plush bunny is a massive hit on Pinterest and among crochet sellers because:
-
It works up in under an hour with super bulky chenille yarn.
-
It is perfect for beginners.
-
It makes an adorable baby shower gift, Easter basket stuffer, Christmas stocking gift, or desk buddy.
-
It is one of the top-selling plush items at spring and winter craft fairs.
The finished bunny is chubby, squishy, and irresistibly cuddly. The ears flop naturally, the body is seamless, and the tiny tail is built directly into the final rounds for a polished, professional look.
Skill Level & Prerequisites
Skill Level: Easy / Beginner-Friendly
This pattern is designed for confident beginners and anyone who wants a super quick amigurumi project.
You should know how to:
-
Make a Magic Ring (MR)
-
Work single crochet (sc)
-
Make increases (inc)
-
Make invisible decreases (dec)
-
Chain (ch)
-
Slip stitch (sl st)
-
Work half double crochet (hdc) and double crochet (dc) for the floppy ears
If you can crochet a basic amigurumi ball, you can make this bunny.
Materials & Tools Needed
For the softest plush result, I recommend super bulky velvet or chenille yarn.
Yarn
-
Super Bulky (#6) Velvet/Chenille Yarn in:
-
White
-
Light Gray
-
Pastel Pink
-
Beige or cream (optional)
-
-
Small amount of pink embroidery thread for the nose
Tools
-
5.0 mm crochet hook (or 4.5 mm if you crochet loosely)
-
10 mm or 12 mm safety eyes
-
Polyester fiberfill stuffing
-
Tapestry needle
-
Stitch marker
-
Scissors
Abbreviations Used
|
Abbreviation |
Meaning |
|
MR |
Magic Ring |
|
Sc |
Single crochet |
|
Inc |
Increase (2 sc in same stitch) |
|
Dec |
Invisible decrease |
|
Ch |
Chain |
|
Sl st |
Slip stitch |
|
Hdc |
Half double crochet |
|
Dc |
Double crochet |
|
St/Sts |
Stitch/Stitches |
Step-by-Step Crochet Pattern Instructions
Finished size: Approximately 4.5-5.5 in (11-14 cm) tall using super bulky chenille yarn and a 5.0 mm hook.
Construction: The bunny is crocheted from the top of the head downward in one continuous spiral. The ears are crocheted directly into the head rounds, and the tail is formed in the final round-absolutely no sewing required.
Head
Round 1
6 sc in MR (6 sts)
Round 2
Inc around (12 sts)
Round 3
(Sc, inc) x 6 (18 sts)
Round 4
(2 sc, inc) x 6 (24 sts)
Round 5
(3 sc, inc) x 6 (30 sts)
Rounds 6-8
Sc around (30 sts)
Ear Round (No-Sew Ears)
You will create two floppy ears directly into this round.
Round 9
5 sc, Ear 1: ch 9, starting in 2nd ch from hook work 1 sl st, 1 sc, 2 hdc, 3 dc, skip next stitch on head and sl st into next stitch, 13 sc, Ear 2: ch 9, starting in 2nd ch from hook work 1 sl st, 1 sc, 2 hdc, 3 dc, skip next stitch on head and sl st into next stitch, 10 sc (30 sts on body)
The ears should hang naturally and require no attachment later.
Face Placement
Insert safety eyes between Rounds 6 and 7, approximately 5 stitches apart.
Add a small amount of stuffing to the head before continuing.
Neck Shaping
Round 10
(3 sc, dec) x 6 (24 sts)
Round 11
Sc around (24 sts)
Round 12
(2 sc, dec) x 6 (18 sts)
Stuff the head firmly at this point.
Body
Round 13
(Sc, inc) x 9 (27 sts)
Rounds 14-16
Sc around (27 sts)
Round 17
(7 sc, inc) x 3 (30 sts)
Rounds 18-19
Sc around (30 sts)
The bunny should now look very round and squishy.
Lower Body
Round 20
(3 sc, dec) x 6 (24 sts)
Round 21
Sc around (24 sts)
Round 22
(2 sc, dec) x 6 (18 sts)
Begin stuffing the body firmly. Add enough fiberfill to make the bunny feel plump but not stretched.
Round 23
(Sc, dec) x 6 (12 sts)
Add a little more stuffing, especially to the bottom.
Bobble Tail (Built In - No Sew)
Round 24
(Sc, bobble, sc, dec) x 2 (10 sts)
Bobble: Yarn over, insert hook in stitch, pull up a loop, yarn over and pull through 2 loops; repeat 3 more times in the same stitch, yarn over and pull through all loops on hook.
The bobble will pop outward and form the bunnys tail automatically.
Close the Bottom
Round 25
Dec around (5 sts)
Fasten off, thread the yarn tail through the front loops of the remaining stitches, pull tight, and weave in the end.
Finishing Touches
These tiny details make the bunny look professionally designed.
Embroider the Nose
Using pink embroidery thread:
-
Make a small vertical stitch between the eyes.
-
Add two tiny diagonal stitches to form a Y-shaped nose.
Hide Yarn Tails
-
Weave tails through the inside of the body.
-
Exit several stitches away.
-
Pull gently and trim close to the fabric so the end disappears inside.
Shape the Ears
For maximum cuteness:
-
Pinch the base of each ear.
-
Gently bend the ears forward.
-
Massage the stitches with your fingers to soften the curve.
Chenille yarn naturally helps the ears stay floppy and adorable.
Make It Even Cuter
Try these easy variations:
Use pastel pink or lavender yarn.
Add a tiny satin bow at the neck.
Place the eyes 1 stitch closer together.
Use white yarn and embroider blue snowflake details.
Why This No-Sew Bunny Sells So Well
If you plan to sell your finished plushies, this design is excellent for craft fairs and online shops.
Advantages:
-
Extremely fast production time
-
Minimal finishing work
-
No sewing means fewer weak points
-
Uses less yarn than multi-piece amigurumi
-
Photographs beautifully for Etsy and Pinterest
Final Thoughts
This Free No-Sew Amigurumi Bunny Crochet Pattern is the kind of project that reminds us why plush crochet is so addictive. It is quick, beginner-friendly, seamless, and unbelievably squishy.
Because the ears and tail are crocheted directly into the body, you get a clean, professional finish with zero sewing frustration. Whether you make one for a child, a friend, a craft fair booth, or your own collection, this little bunny is almost guaranteed to become a repeat pattern.
Save it to Pinterest, make a whole rainbow of bunnies, and enjoy the magic of a one-piece, no-sew amigurumi design.
Happy crocheting! 🐰🧶